 Markit | Docs
Connect your AI tool
Step-by-step setup for Claude, Claude Code, ChatGPT, Codex, VS Code, and Zed
Every AI tool connects to Markit with the same server URL:
You'll need to be on the Essential plan or higher (see What is the Markit MCP?). You can also copy the URL from Settings → MCP in Markit.
Claude (web, desktop, and mobile)
- In Claude, go to Customize → Connectors.
- Click + Add, then Add custom connector.
- Name it Markit and paste the server URL.
- Leave the authentication and OAuth client settings on their defaults (Use Claude's published identity is the recommended option). You don't need a client ID or secret.
- Click Add, then Connect.
- Sign in on the Markit consent screen and click Approve.
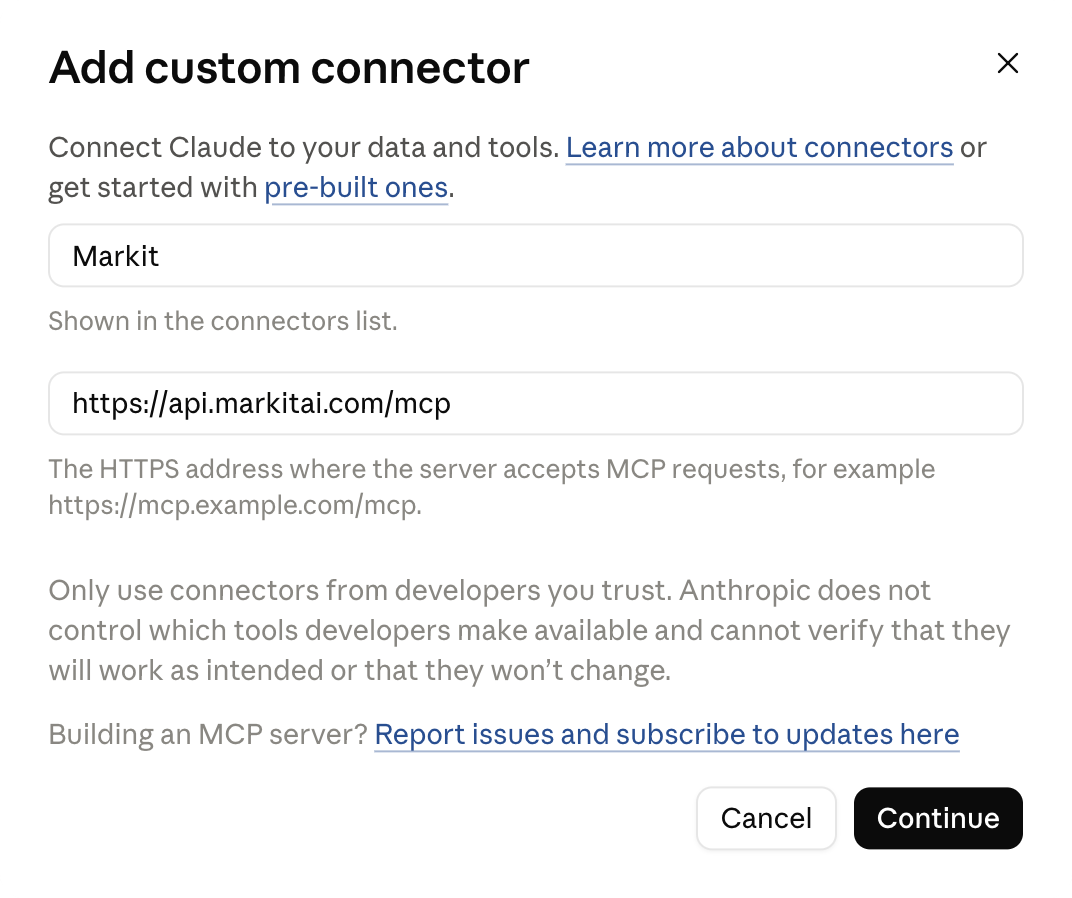
On Claude Pro and Max plans, you add custom connectors yourself. On Team and Enterprise plans, an owner adds the connector first under Organization settings → Connectors, then each member clicks Connect on it under Customize → Connectors.
Once you add the connector on the web, it's also available in the Claude desktop and mobile apps.
Claude Code
- Add the server from your terminal:
- In a Claude Code session, run
/mcp, select markit, and sign in on the Markit consent screen that opens in your browser.
You can run claude mcp list to check that Markit shows as connected.
ChatGPT
ChatGPT connects to custom MCP servers through developer mode.
- Turn on developer mode in your ChatGPT settings.
- Create a new app (connector) using the Markit server URL, and choose OAuth for authentication.
- Sign in on the Markit consent screen and click Approve.
Developer mode and custom apps are only available on some ChatGPT plans, and OpenAI limits which plans can use apps that make changes (write actions). All of Markit's current tools only read information, so this doesn't affect them today. Check OpenAI's help center for the latest on your plan.
OpenAI Codex
- Add the server from your terminal:
- Sign in:
- Approve the connection on the Markit consent screen.
You can also add Markit directly to ~/.codex/config.toml, then run codex mcp login markit:
The Codex CLI, IDE extension, and desktop app share this configuration.
VS Code (GitHub Copilot)
- Open the Command Palette and run MCP: Add Server.
- Choose HTTP as the server type and paste the server URL.
- Name it markit.
- When VS Code asks you to sign in, approve the connection on the Markit consent screen.
Or add it to .vscode/mcp.json in your project:
Zed
- Go to Settings → AI → MCP Servers, click Add Server, then Add Remote Server.
- Paste the server URL.
- When Zed asks you to authenticate, sign in on the Markit consent screen and click Approve.
Or add it to your Zed settings.json. Leave out any Authorization header so Zed signs you in with Markit:
Try it out
Once you're connected, try asking your AI tool:
"Use Markit to tell me which account I'm connected to."
See Available tools for what your AI tool can do with Markit.
Other AI tools
More AI tools are coming soon. If your app isn't listed here, it may not be able to connect to Markit yet. Let us know which tool you'd like to use.